Building, Running and Simulating STM32F405 on Simulator86
This is a quick tutorial to show you how can you run Rust code and simulate STM32F405 board using Simulator86!
Starting The Project
First things first, start a new project by clicking on this link. This will create you a simple project that contains a STM32F4xx-hal in Rust template. In src/main.rs you’ll find all the logic used to manipulate the GPIOs as well as a diagram that includes the STM32F405 Express board from Adafruit and seven segment display.
It’s just a little project that runs the segments in different flashy animations, should look like this:
Building a 1 to 9 counter
As a quick intro, let’s dive into a simple, hands-on tutorial that gives you a first taste of what the app is all about.
Starting by setting up the board and cortex-m peripherals, we’ll need only 7 GPIOs pins to act as an output.
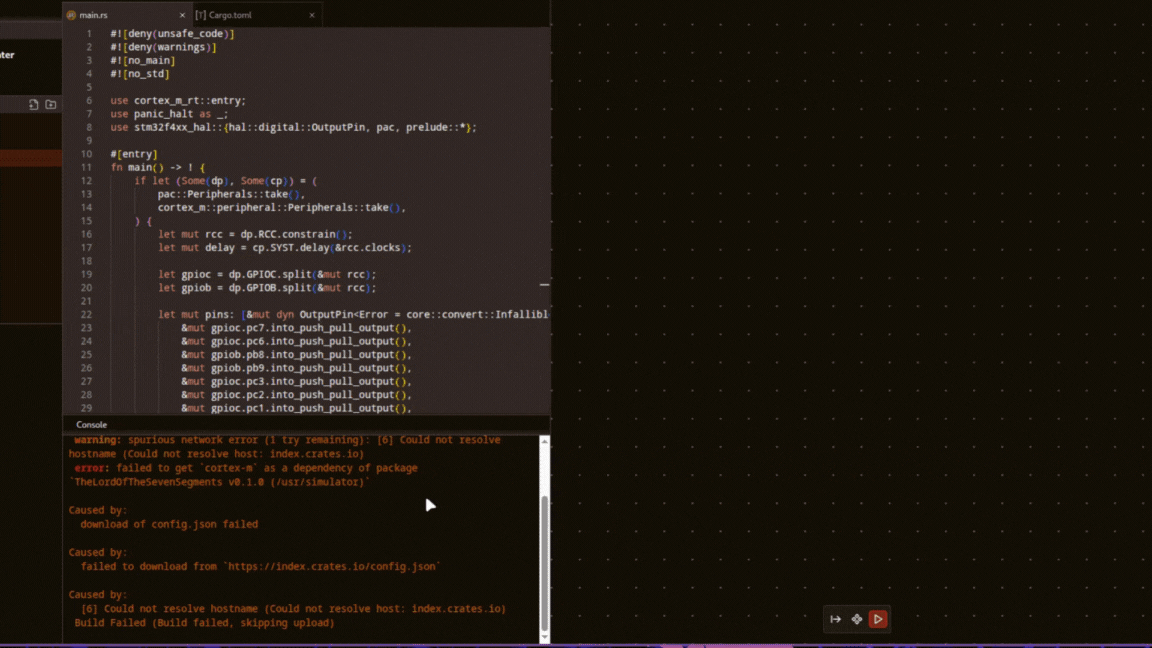
Let’s delete everything in main.rs and add the following:
#![deny(unsafe_code)]
#![deny(warnings)]
#![no_main]
#![no_std]

use panic_halt as _;

use stm32f4xx_hal::{self as hal, hal::digital::OutputPin, timer::SysDelay};

use crate::hal::{pac, prelude::*};
use cortex_m_rt::entry;

#[entry]
fn main() -> ! {
    if let (Some(dp), Some(cp)) = (
        pac::Peripherals::take(),
        cortex_m::peripheral::Peripherals::take(),
    ) {

        let mut rcc = dp.RCC.constrain();
        let mut delay = cp.SYST.delay(&rcc.clocks); // Setting systick to default (16mhz)

        // GPIO setup
        let gpioc = dp.GPIOC.split(&mut rcc);
        let gpiob = dp.GPIOB.split(&mut rcc);

        let mut p5 = gpioc.pc7.into_push_pull_output();
        let mut p6 = gpioc.pc6.into_push_pull_output();
        let mut p9 = gpiob.pb8.into_push_pull_output();
        let mut p10 = gpiob.pb9.into_push_pull_output();
        let mut p11 = gpioc.pc3.into_push_pull_output();
        let mut p12 = gpioc.pc2.into_push_pull_output();
        let mut p13 = gpioc.pc1.into_push_pull_output();

	loop {
            for i in 0..9 {
                display_number(&mut pins, i + 1);
                delay.delay_ms(1000_u32);
            }
        }
    }
}
Then we’ll add the this simple function that displays a number on the seven segment.
fn display_number(pins: &mut [impl OutputPin; 7], number: u8) {
    let segment_map: [u8; 9] = [
        0b0111111, // 1 -> abc_efg
        0b0000110, // 2 -> ab_cd_efg
        0b1011011, // 3 -> abc_d_efg
        0b1001111, // 4 -> _bc_d_efg
        0b1101101, // 5 -> ab_d_efg
        0b1111101, // 6 -> ab_defg
        0b0000111, // 7 -> abc____g
        0b1111111, // 8 -> abcdefg (all on)
        0b1101111, // 9 -> abcd_efg
    ];

    // Get the segment mask for the given number (1 to 9)
    let mask = segment_map[(number - 1) as usize];

    // Activate the corresponding segments based on the mask
    for i in 0..7 {
        if (mask & (1 << i)) != 0 {
            let _ = pins[i].set_high(); // Set segment to high
        } else {
            let _ = pins[i].set_low(); // Set segment to low
        }
    }
}
Finally, we’ll edit Cargo.toml just to rename the package name to SevenSegmentCounter.
[package]
name = "SevenSegmentCounter"
version = "0.1.0"
edition = "2021"

[dependencies]
cortex-m = "0.7"
cortex-m-rt = "0.7"
panic-halt = "0.2.0"


[dependencies.stm32f4xx-hal]
version = "0.23.0"
features = ["stm32f405", ]


# Set the default for dependencies.
[profile.dev.package."*"]
opt-level = "s"

[profile.release]
codegen-units = 1
incremental = false
debug = true
lto = true
opt-level = "s"
With that, we could either use the old components and add from the scratch. For the sake of the tutorial, we’ll delete them then we’ll just add the board and connect the pins with segments accordingly (5-13, a-g), leaving COM1 and COM2 unconnected. Ignore the error message for now that is poping near the board.
Now we’ll build the source code to get the binaries. In order to build, click on the build button on the top left. Right after the build is finished, You’ll be able to see the elf file which should be in target/thumbv7em-none-eabihf/release/sevencounter.
Simply drag the elf file SevenSegmentCounter to the board.

Run the simulation
Since everything is done now! You’ll have to run the simulation by clicking on the play button in the diagram bottom panel.
Below is the end result!
This is it! It’s the most easiest way to start a project, share snippets and simulate MCUs! In case you need support, join our discord community!